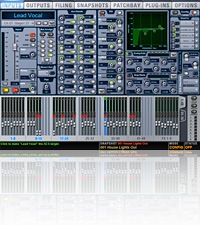
My Latest Venue Adventures

I’ve been meaning to post my thoughts on version 2.6 since I’ve been running it for a month now, and I’ve also got a little something new I’m trying this week to tell you about.
The biggest v2.6 features for me are definitely the blank channel and bank safe features. The blank channels are great, and I find myself using all four banks on just about anything I’m mixing now. The process of adding blank channels is definitely easier when done at the console, however, it is still a bit clunky. The ability to move blanks around in the same way as regular channels would help, I think, but I’m just happy to have the ability to do this at all right now.
I wasn’t sure how much I would be using bank safe for week to week services, but I’ve actually been giving it a fair amount of use. It is great for transitions when I want to keep one or two channels up but I need to flip to a new bank for what’s coming next. Combined with the channel blanks, I’ve been moving instruments I primarily drive from VCAs to lower banks. I’ll strategically place them and use a combination of bank safes to allow me to flip a small section of the console between instruments. For example, lately I’m sticking my 4 faders of electric guitars under my 4 faders of keyboards. I get the guitars where I like them and then mix them off VCAs, but the keyboard blends tend to run all over the place depending on patches so I like those on top within reach. I then bank safe all my top layer musical channels except for the keys and alternating between Bank A and B switches those four faders between keys and guitars.
The snapshot crossfade bypass has also been coming in handy. It’s proving great for doing a virtual pre-show run of all my snapshots. Plus it’s also working great for when I need to jump around from snapshot to snapshot during rehearsals.
This week I tried something new that I should have done a long time ago. We record the music for every service every week. This serves three purposes: mix evaluation, band evaluation, and archive. However, recording is often the last thing any of us are thinking about at FOH, and consequently it often gets forgotten. So last week I did what I should have done a long time ago. I wired Pro Tools to the Venue so that I can start and stop Pro Tools with the Venue.
It was easy to get running. I simply added a MIDI interface to our ProTools machine. Then all I had to do was click on option somewhere–sorry I don’t remember the exact location–for Pro Tools to respond to MIDI Machine Control messages. On Sunday I simply armed all my tracks and then armed the transport for record. Then I added a MMC message for either “play” or “stop” to the snapshots where I wanted to start and stop recording. It worked great. But I do have a few tips if you’re going to try this out.
First, make sure you have the “Transport RecordLock” option in the Preferences checked. This is important if you want to record multiple times such as multiple services in the same day or different sections of a service. If it’s not checked, once you stop the recording you will no longer be armed to record. The same goes for your “Audio Track RecordLock”. The next option that is important for recording is to make sure you have the “Timeline Insertion Follows Playback” option checked. If this isn’t checked, you will record over your previous recordings on the timeline.
This morning I never touched Pro Tools once everything was armed, and it was the smoothest recording I’ve done. I highly recommend it. I’m still working on hooking up multiple computers to the Venue’s MIDI output, though so that I can fire QLab and control Pro Tools. When I get that figured out, I’ll let you know; a MIDI thru box should do the trick as soon as I get one.


I’m a huge fan of the Midisport 2×2. Simple, 2 midi I/O. We use many of them around the church, both for Midi controllers for loops, Digital Effects on our mixers from computers, as well as with Logic and ProTools in the studio spaces.
I have a Midisport 2×2, but it won’t work for me because I can’t get the Midi thru to split into two outputs. The thru on the 2×2 works more like an interface bypass from what I can tell. I have one MIDI out from the Venue that I basically need to “network” to multiple inputs on different boxes. I’ve been using the 2×2 as an interface with Pro Tools, and I can just pop the thru button in or out to select which machine I want MIDI routed to right now. But long term I don’t want to have to remember to do that so I’ll just pick up a little MIDI splitter commonly known as a MIDI thru box.