Simulating Analog – Part 4
I think this is the last part of this series on analog-style plugins so it’s time to get practical in approaching these. As I’ve mentioned, I recently started using Waves’ NLS so I’ll use that as the example since it’s still fresh for me. However, I approached NLS pretty much the same way I’ve always tried these things so hopefully you can take these same concepts and apply them to the wide variety of plugins that are out there.
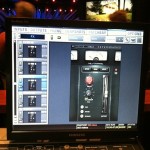
My approach runs pretty close to Hugh Johnson’s as he explained on Waves’ website. I started by inserting NLS on all the inputs I wanted to try it on which is pretty much every music input minus maybe the hi-hat and ride. I then solo’ed each input and turned the Drive knob up halfway to get NLS working a bit. Next I checked each console type and picked my favorite for that input.
When flipping between console types, the differences didn’t always jump out. Sometimes there was a clear winner, but sometimes it was just a feeling that I liked one a little better. In general I didn’t listen very long and just used my first impressions to make a quick decision.
After choosing the console type, I flipped through some of the different channel presets to see if one jumped out at me as particularly good on that input. Finally I’d adjust the Drive knob to taste on that input and move on to the next input. In some cases, I’d turn Drive all the way down because NLS is still working at that level theoretically along the same lines as a traditional desk would.
Once everything was set, I started actual mixing. I tweaked a drive setting here and there, but by and large I didn’t touch any of that after things were initially set. After my first week of use, I created my own channel presets from my mix and applied these presets to my template. In essence, this gives me my own custom console with each input flavored to my personal tastes with flexibility to change things on a week-to-week basis.
I think you can take that same approach with just about any analog-style plugin, but here are some more general tips.
I think there are some misconceptions of just how much saturation to use. When I think of a more traditional use of saturation in the studio, I really think of tape saturation and only on some specific inputs like drums, bass, and maybe guitars. All the analog stuff in use will have an effect on things, but it’s not driven hard intentionally all the time. When it comes to analog consoles like NLS is emulating, I don’t think of that as a place where I would hit a lot of things hard. Again, maybe in some cases, but it’s probably not typically a deliberate saturation.
So to get these plugins working authentically, it’s important that your gain staging is good. If your input levels are too low, the plugins won’t always work as the plugin designers intended. On the other hand, if your levels are too hot the plugins will often overwork. Lately I’m typically putting inputs around 0 dB or a little below it on the VENUE with RMS meters engaged. That’s roughly the equivalent to -20 dBFS RMS in a digital system. You can get some plugins to work if you run a little colder, but I know that recording forums are littered with posts of guys who have problems because they run their levels too hot and end up with things colored too much. The meters on many plugins don’t help this either because they seem to be more of a digital scale instead of a traditional analog VU scale.
This brings up another point. I think analog style plugins are easy to go overboard on because turning the effect up often makes things interesting and exciting. However, within the context of a mix you can also end up with things being over processed. And sometimes, just like on old analog consoles, that over-processing can be nasty and unpleasant distortion as opposed to a flavorful saturation. Sometimes a good strategy with analog style plugins is to turn things up to where you clearly hear what’s happening, and then dial it back to where you can’t or almost can’t quite blatantly hear it. I know I’ll often split the difference on my initial settings when I’m testing new plugins like this.
You might ask what’s the point if you can’t obviously hear it?
The point is that these things are still working, and you don’t want them to be obvious in most cases. A good way to hear the difference is to all plugin instances set, put together a mix, and then turn them all off and listen to the results.
To help educate you guys on what happens with these plugins, I did just that with a recent rehearsal board mix. I bounced two versions of a static mix for this: one with NLS on and one with NLS bypassed. Then I spliced the results together alternating every 5 seconds between the two versions. The demo starts with NLS engaged. While I can hear a difference on laptop speakers, I’d suggest using something a little better to listen to this. If you’re having a hard time hearing a difference, try focusing on different parts of the frequency spectrum or specific instruments while listening. Don’t be afraid to make multiple passes to analyze different elements.
[audio:nls-5.mp3]Now, I don’t know what you hear when you listen to that demo. You may prefer the non-NLS version, and that’s OK. For me, however, the NLS version is fuller and livelier. I don’t want to point things out specifically so you can form your own opinion, but when NLS is bypassed I feel like something goes flat.
Of course, the problem with this demo is that I was mixing into NLS when I put together the mix so it’s hard to say what the results would have been if I hadn’t used NLS. Personally, I think it would be hard for me to recreate the same feel on some things without NLS or a similar style plugin or a real piece of analog gear.
I guess my bottom line experience with these plugins is when I have them spread across multiple inputs, I feel like it’s easier to get a mix in the ballpark and achieve separation without a ton of EQ surgery. It’s not necessarily a night and day thing, though. I also feel like there can be a little more excitement in my mixes when these are working. It’s not a necessity for me to have this stuff, but I do miss it when I’m in a DSP limited environment. These plugins are the first things I will dump in those cases because some do tend to use a fair share of processing.
If analog-style plugins are new for you and you’re curious about what they might do in one of your mixes, I’d recommend you demo some of the plugin options out there. I like what these bring to my mixing, but I also know a good number of guys I respect who don’t use this type of thing. Your mileage with this stuff will vary, so don’t worry if you feel like it’s not your thing.

 Previous Post
 Next Post


Definitely like the plug. The value in a live mix would be somewhat less. But for tracks on a recording – definitely. The processed signal has a warmth, which plays well with the bass and the low end of the snare. In a similar way that quantization “humanizes” a computer-generated MIDI drum track, the NLS plugin seems to humanize the audio track. It adds a warmth and presence that bare digital can struggle to emulate.