
State of the Mix – Fall 2010: VENUE Internal Routing
This was something I knew I could do, but Scovill suggested I really give it a look for some of the bussing stuff I’m doing.
On occasion I have found the need to route audio OUT of the desk and back in on a channel in order to process something a little differently or to do something that might seem overly complicated at first glance. For example, I would do this for things like my music feed that goes to halls and tape so that I can tweak the tone a bit for our friend and foe, Equal Loudness. I would previously do this by using physical cables on the back of the Venue FOH rack, but there’s actually a way to do it internally. The only catch is you have to route through a plugin.
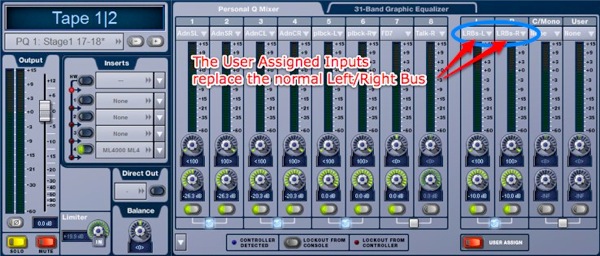
I hesitated from using this method in the past to save DSP, but now that you can configure an 80 channel show, I have some DSP back so I’ve started playing with this. I just put a plugin in the rack and set the input to my output bus. Then I have the plugin return on an input channel. Then I can add it to a matrix or PQ via the user assignables or even put it in the global mix. The photos below kind of display how I set this up for processing my music bus as described in part 4 of the Harsh Reality series.

Step 1: 4 Band EQ 3 Plugin for L/R Processing
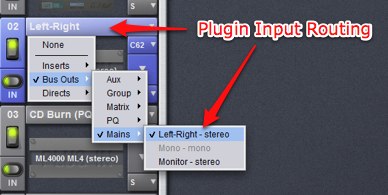
Step 2: Plugin Input Routing from Bus Out
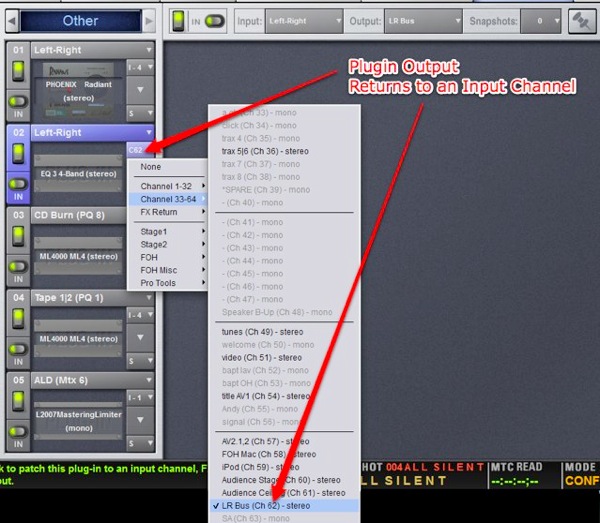
Step 3: Plugin Output Routing to Input Channel

Step 4: Input Channel Added to PQ User Assignables
 Previous Post
 Next Post


